Monday, November 19, 2012

Christmas House ~ Part III:

So I have really just been working away on the fine details before I can get the house assembled.  While typing away I realized that I haven't shown you my color palette yet...I chose warmer colors, but all three Christmas themed...

I have finished staining all the interior pieces I wish, (with the exception of crown moulding and baseboard)...I will have to do that later)... I've painted all the exterior pieces and they are ready to go, the final step before I can assemble is deciding on the wallpaper/s...

I'm torn between putting up a printed paper, and using just a plain color, and what plain color to use... so I it will be another day or so before that decision is made.

At my last trip to Michael's, I made sure to scour every aisle looking for add-ons to so speak for the house and this is what I found...

Lights for my tree, I hope.  They are Lemax lights, and were not cheap by any means, but I *think* they are small enough for my tree!

Ornaments?  Well, more buttons, but I think they could make some good ornaments, what do you think?  Then there's also more cookie-cutter type things too...


Lastly, Pointsettia's...I have a particular idea for these, but more on that later... ;)


Friday, November 16, 2012

Christmas House ~ Part II:

The house arrived in almost no time at all.  I suppose that's the benefit to living only about a state away from the manufacturer!!!  I did a lot to this house while waiting for my camera batteries to charge, so there are not a lot of photos...

It didn't take long for me to get my hands on it!  It's very tiny and there are not many pieces and parts, (for instance there are only 3 windows to assemble, the rest are just trims that will be glued onto the walls.  In one evening and about two hours today I've done quite a lot! 


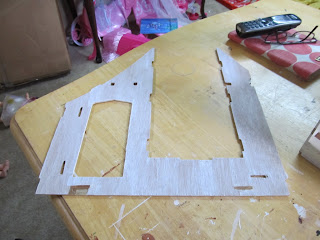
I started with labeling and punching out each piece, I then organized them into paper bowls to keep them together and sorted. 

I then did the dry-fit of the house.  I have a basic idea of how dollhouses go together and being so small and not many "structural" pieces I honestly have yet to read through the directions.  I do not recommend this for everyone, I just kinda knew what I was doing and where everything went.  It really does go together that simply though. 

I made some markings during the dry-fit on what I want to pre-finish before assembly.  I have to wait for my wallpaper to arrive so I can make the wallpaper templates, but I already had my flooring handy so I drew and cut the floors for both the first and second floors. 

I then started staining.  I don't want white trim in this house, I am opting for stained trims.  I stained all the interior window casings and the interior of the front door. 

There is a bay window and it has a built-in window seat/bookcase, so I stained that front piece.  I will add knobs or something later.  I didn't stain the top part as I have a plan for that, but more on that later... 

I then stained the floors.  The flooring is red oak paper by Houseworks, and it's very nice on it's own or with poly, but I opted to put some stain on it to make it warmer.  I painted on the stain, (each floor board separately, there's not a lot) with a regular paint brush.  I wanted the stain to seep into every crevice on the flooring paper to get a little character in it. 


I next marked on the roofing where painting needs to be done, and made the templates for the shingles for later.  The interior of the bay roof, the entry roof and (possibly) the gable roof will be painted a creamy-white, along with the first floor ceiling.  The rest of the interior roof will be papered, the back roof included. 

The only final decision I have to make is whether or not to add a fireplace.  If I do so, a first floor side window will have to be eliminated, but that shouldn't be too much trouble.  The problem is finding the right fireplace to use!

Thursday, November 15, 2012

1/2scale Buttercup/Christmas House (Part I)...

The 1/2scale Buttercup is a really sweet house, it's also done in laser-cut so there is virtually no sanding necessary... I am coming up with some final design ideas while I wait for the house itself to arrive. 

The first thing that I did was to pick the wallpaper and flooring. 

For the wallpaper I chose two prints from a small collection of holiday papers that I found online.  The flooring I chose the red oak hardwood paper by Houseworks.  I was debating on lighting the house, and decided against it, but I will divulge more on that later. 

The house is so small that too much furniture will make it looked over-crowded and cramped, so I'm trying to chose just the right pieces and their placements and create more of a "scene" than a "house"... 

The outside of the house I'm a little nervous and excited about.  I plan to texture the outside, like stucco.  I have never done that to a house before so I'm a little nervous on how to do it and hope that it will come out the way that I want. 

Wednesday, November 14, 2012

Holidays On The Mind ~

I have to admit, I am suffering from a HUGE case of the "Holidays On The Mind" right now!!! 

I think it might have to do with what I found at Michaels the other day...


These are all buttons!!!  They come in packs like this...the first is stockings, then a cookie display, there are really tiny cookie cutters in there!  and the last is some Holly Berries.  I found these in a holiday aisle at Michaels, (very randomly)...they have my head buzzing!!!  

I probably got into the whole dollhouse hobby in order to be able to decorate it for the different yearly holidays.  In the length of time I've been working on dollhouses, I have nothing to show for being able to decorate a house...so I decided to do a holiday themed house instead!

I'm going to take a small pause from the Farmhouse, (yeah, I know I just started on it again!).  You can blame Greenleaf for that!  They had a big sale to celebrate the end of the election season and of course, I took part. 

I ended up with a laser-cut 1/2scale Buttercup kit...


I want to make this a house you might see in the North Pole, not so much a "gingerbread" house, but more along the lines of a house that an Elf might actually live in.  I want to use some of the button/decorations I showed you above, of course a decorated tree, some special wallpaper that I found, and lights.  I am going to make this very "cozy/cottage" with possibly a fireplace, just have to decide if I'm willing to lose a window for that!  

I am pretty excited about this house, I can't wait to get started on it.  This particular house is really only two rooms, so it shouldn't take very long to finish it at all...that's the plan/hope anyways!!!

Tuesday, November 13, 2012

My First Built-In ~

If you belong to any of the miniature forums that I do, you've already seen my pictures of this, but I thought I would follow it up with a detailed post. 

I had been playing around with the staircase  staircase wall for the first floor and came up with the idea to create a built-in.  I wasn't really sure what I wanted to do, but I remembered I had a half-scale Houseworks bookcase in my miniature stash


I first measured out where on the wall the stairs and the bookcase would go I then created a support behind the bookcase to make up the difference in the width.  I decided it should be flush with the staircase rather than sit in...


I then used a template and cut the triangle piece that goes between the staircase and the bookcase, and then did the same for the top piece...


I then built out the opposite side piece, and wrapped it around the corner... I supported everything from behind in the same way as the bookcase, it's a bit wonky looking but no-one will see that once it's finished. 


I next need to paper the staircase wall, attach the staircase and built-in unit to the wall, and mud, sand, paint and paper, but I'm really happy with how everything came out...

Monday, November 12, 2012

Back From A Long Hiatus ~

So I am back! 

I know that I’ve been gone for a very long time, and the reasons are extremely personal.  I would much rather keep the blog focus on getting back to the Farmhouse and bog down with the whys… So I will just say “HI!” and “I’m back!  Did you miss me?”

I would like to try to do a big push to getting the Farmhouse complete or at least near complete before the Holidays.  I have some time right now where I’m going to be stuck at home with not a lot to do, so it makes the perfect opportunity for me to miniature my heart out!  

So let’s pick up were we left off…
The last thing I showed you was that I had glued the main structure together, attached the porch boards, run the wire channels and showed you a preview mock-up of my patio area that I want to create.  I got stopped up by something with the house, which had initially been the reason for my hold.  I kept getting into a mental funk about it, and wondering what it was that was stopping me, and now I know what it is.  The wiring channels!!!

I had run and cut the wiring channels in order to make my floor work, however, I’m unhappy with the decisions on the wire channels and I’m going to sacrifice my floor and budget (because I’ll have to figure out a new floor).  So I’m going back and going to re-cut my wiring channels in order to make them work out the way that I want. 

I next want to go really “farmhouse” on this.  I’m going to stick right with the feel that this house keeps giving me and I’m changing out the wallpaper,  and possibly part of the patio) and some of my interior lights also. 
Here are my ideas for lights…

Exterior Coach Lights

Table Lights

Ceiling Lights

Floor Lamps

I’m super happy with this decision as I’ve not really seen what I’m planning (as far as decor goes) on another house, let alone a half scale house… I hope you like it too!!! :)

Monday, July 2, 2012

The Patio (Part I) ~

I mentioned last week that I had a big plan for the house that was a surprise, I have finally progressed along enough to be able to start my reveal... so check it out...

It's the patio on the side of the house... ;)
(the bay is just standing in place, it is not glued together yet)

I had told you previously that I had cut an opening for a double french door off the right side of the house... here is the updated version of that, (with the yellow walls and white trim)...

I did this with the intention of these doors leading out to a patio! 

The walls of the patio some builders might recognize.  They are porch walls from a Fairfield.  I knew the sheet number they came off of, and I ordered just that sheet to use for this purpose. 

This is really the beginning stages of the build out.  The house itself will sit on it's own foundation, and then that will sit on a base large enough to accommodate the house and porch.  I also have a great floor planned out for this area as well, but more on that later...  
The furniture seen is intended for this space... I will probably change the color from white to a darker shade, and I am definitely changing out the cushions for something with a nice print.  I will include some plants and incorporate some type of a roof, though the roof is very unclear at this time...  


SO happy with how this looks, I cannot wait to see more of it...


Friday, June 29, 2012

More on the Porch ~

I was able to do some more work on the porch. 
I think this is becoming my favorite part of the house, (right now anyways)...

I mentioned previously that I had painted the porch floor base black.  I had pre-cut enough strips to cover the width, (I plan on boxing it in around the edges, but need more bass-wood strips).  I taped them down with masking tape, 3 strips at a time.  Once they were all glued, I taped them vertically to keep them together...


I wish that you could see better the detail that this has to it... I am so impressed, (if the bass-wood per strip cost less money I would be using it as flooring for the entire house, I love it that much!)  Here's a close-up image so you can see maybe why I like it as much as I do... :)


The house is all glued together and I was able to take the tape off of it.  I have yet to add the third floor or the bay yet, and that's because I still need to access the interior for decorating and without either of these in place yet, it will make it that much easier.  Until then I put up the porch to the house so I can see how it looks so far...


I then propped up the primed red door to see how it will look...

I have a big plan for the farmhouse that I had been planning on waiting to show you until I was further along, but I am excited about it, so check back on Monday for more!!! :)

Thursday, June 28, 2012

More on the Farmhouse ~

So I learned two things yesterday...
1 - You do read my posts, Blogger doesn't count my readers correctly...
2 - I cannot comment on my own blog! :P

I tried so hard to respond individually to your lovely comments, I adore getting them...makes me feel special... ;)  However, I don't know what I'm doing wrong because I cannot respond back. 

Moving on ~

I had the opportunity to assemble more of the house today...here she is! :)


I had debated on the porch floor, (you saw in my post yesterday) and after I saw the pictures I really loved the bass-wood option, however, I rotated the wood strips to go horizontally. 

 I opted not to make it like a staggered wood floor, I really wanted the look of a deck.  I know that it's hard to even see, but I'm hoping once it's painted and finished it will look much more notice-able. 

Here it is against the house...
The real porch floor is just a piece of plywood, and these strips will lie on top of that, so I painted the plywood solid black so if there ended up being separation of the strips of bass-wood, you would see only the black underneath.

I also did some work on the windows and doors.  I must have been off in the distance somewhere yesterday because I am up here posting pictures of this yellow house and dark ivory windows.  After poking around in older Farmhouse posts of mine, I found my inspiration photos and realized it's just been a long time since I worked on the house and hadn't finished the windows. 

I sanded off the ivory color and then spray painted everything, (I personally think the finish is better with the spray paint).  I need to add the varnish and then these are done, (with the exception of the opposite side of the front door... ;)
I'm really happy with how they came out... :)

I then pulled all the tape off, (because the house is dry enough now), and checked out my wiring channels, pretty much just re-visiting my ideas/plans, refreshing myself.


I'm pretty happy with those too... :)

Wednesday, June 27, 2012

The Farmhouse?

I think you are all not speaking to me any more... probably because I've been gone for a while now, and another hint I got when none of you read the Glencroft post... (hint taken)...

I haven't much to post, as I haven't had much time to work recently... (hence the absence!)... I did decide to do some work to the long neglected 1/2scale Farmhouse though.  Being 1/2scale it's much easier to work on... really, it's like oh, here's the small little house that fits on a TV tray stand and in half the time you can do double the work!

When I last left off on the farmhouse I was working on the front door...I had gotten it mostly painted and ready for installation. 

I had also cut the crown molding for a great deal of the first floor, (though not done yet...). 

I don't think I mentioned this in a previous post either, but I also finished painting the first coat of the exterior color.  The color is really light, but it's shown in the pictures below... :)

I did a quick dry-fit last night, ensuring that I had packed all the pieces together, and made some decor decisions... one being my porch floor...

To the left is 1/2scale Greenleaf siding strips
To the right is some bass-wood sticks I picked up at Michaels

I think I'm liking the bass-wood a bit better,
and I think I'm going to go horizontal instead
I need to order the flooring for the inside of the house, but until then I started gluing the main structure together.  I'm thinking I've gone as far as I can without the structure being together... I forgot the camera for this part, but it's boring anyways... ;)


Wednesday, June 6, 2012

The Glencroft...Day I ~

I have some spare time this week so I thought I would try to mini as much as I possibly could do!  I decided to crack open the box on the Glencroft. 


The wood looks a little old, but other than that it's in great condition.  For what I paid, I'm very happy. 

*I have not defected on the Newport, in fact, I'm ready to put up some walls, however I need my DH's help to cut out the openings for the new doors and windows before I can do that.  As soon as he does that you will start to see some progress, (hopefully this weekend!). 

I have a handle on how the beginning of the build goes(from helping out previously on this build), so I started by doing some early prep work.  Even with knowing how to start this build, I did read and read and read the directions and put in a note or two on where I should stop, in order to be able to do what I have planned for the house, (in regards to the lighting, decorating, etc.).   

I put a coat of Minwax Cherry stain on the first and second floors, I'm very happy with how the over-all color came out.  I do need a second coat and a poly on this too, but so far, so good! 
 

I then primed the beginning interior walls for assembly.  I have a plan for how I will decorate the interior and exterior and priming is a good place to start.  The walls will be covered, but the wood is a little bit old and is dry, so that first coat of paint is a necessity this time. 

The front wall was confusing to me at first.  I popped out the very bottom tabs thinking they attached into the front part of the first floor, I was wrong.  There are two sets of tabs, the very bottom ones are what the front base locks into to create the front yard and fence.  The tabs "above" (one tab is the front door) the very bottom ones are what lock into the first floor.

I then assembled the side wall...

Wall A...

And the back foundation wall...
I debated for a while on what I wanted to do with the finishing of the back wall, I finally came up with my idea, which is why this part of the staircase is painted, (the rest will be stained), but there will be more on that later. 
I am going to let the structure dry for a while at this point...and see what's on deck for the next part... :)

Friday, June 1, 2012

Extra Time...What Is That? ~

No, I haven't defected...I also haven't given up on the Newport in favor of the Glencroft either.  In fact the box for the Glencroft arrived and I haven't even opened it yet, I've been that busy!!!

The nice weather, at least for me, means I'm spending as much time outside as I possibly can.  I just finished weeding, doing some planting and mulching my little flower gardens... I ventured far out, (for me) and even planted a strawberry plant this year!

But possibly the most important thing that is going on in my world right now is that my baby girl is having a big birthday party this weekend!!!  Of course the one day of the whole week they are predicting rain has to be on the day that my party is planned right? 

I still have a bunch of stuff to do for the party, but at least the yard is ready if the weather does hold out. I will be back to my mini-ing self next week with lots to show for my absence...so stay tuned a bit longer... :)

Tuesday, May 22, 2012

Yeah, I'm Crazy!!!

I really cannot explain why I do the things I do...

I won an Ebay auction for a Glencroft Dollhouse Kit...
I have to admit first off, I am so jealouse of Glencroft builders.  I had a brief hand in helping with the beginning of a Glencroft already and I loved it so much!  I am not sure why, but to me, it is so unlike most other Greenleaf builds.  I find that the design, while easily customize-able, is also wonderful as a basic build. 

I do, already, have many very specific ideas for how I want this to look.  I am so excited about it, I can hardly wait to work on it, meaning I will probably have the Newport going at the same time as this build.  ~ (insert crazy part here) ~

I like the original idea that a member on the Greenleaf Forum had when she bashed out the side window on the staircase to create a little alcove...it's so nice and I plan to replicate it in some form.  I also love the idea of the window seats that she did and plan to incorporate something like that as well...

I have the idea that it's going to be like a country in the woods cabin style...I don't intend to go towards the "tudor-ish" of it all, but rather playing with the beams and incorporating more stained wood that I would normally.  I'm not sure how "modern" I want to go, or stick with more of a time-piece. 

I love the updated take on this house, the windows are gorgeous!
They remind me of my Woodstock ones...
I love the stone work around the doorway also...

I have a thing for the darker tan and red brick combination shown here...
This is what the tudor houses near me look like...

I would also like to play around with creating my own fireplace, (like many other miniature-ists have done).  There are walls on the first floor and second floor that are both all fireplace.  I have some ideas along the idea of these styles to incorporate into the design...

I like the more updated feel to this room,
while still being cozy and warm...

I could create an open concept kitchen/living room (like this one)
 by bashing out the interior wall...

Or stick to the older feel of the house,
altering the side window off the kitchen to create two windows
I have thought about this house for almost two years now...so I have many ideas to choose from...these are just some of my favorite ones... what do you think?

*All images are from past Google searches, I never saved any links to them...
if they are yours please let me know and I will remove.*