Tuesday, February 14, 2012

Real Good Toys Facebook Build-Along

If you are a fan of Facebook, (like me), you may already know about the Real Good Toys Facebook Build-Along.  For any non-Facebookers out there, this is the 2nd time that RGT has done this, they provide a basic kit, that's rather affordable, and you build and decorate along with them.  You are able to provide pictures and work with and share along your progress.  This year's kit is rather unique as it's not a "traditional" kit, but rather a puzzle, meaning you are given a bunch of blocks and you put together whatever your heart desires...

Check out the link below for more detailed information...

http://www.realgoodtoys.com/store/productview/117326//The_Puzzle_Dollhouse_Kit

I must admit, I appreciate this much more than I do the contests.  I am that creative, think-out-of-the-box, so being able to see what others are doing, get ideas, help along the way, seems like it would work out the best for me.  So I've decided to take the plunge!!! 

A sales associate at RGT inspired me with a great idea.  She is currently creating a garage to go along with her house...well, that inspired me to create something for the Woodstock...

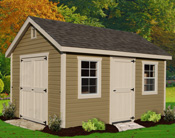
I don't want to do a garage, (not yet, and not out of this kit), but one of these puzzle kits would be the perfect size for a shed!!!  So I think that I've decided to create a shed for the Woodstock out of my kit... Check out my design inspiration...

I have a large amount of ideas for this, what I want to do, and how I want it to look, I'm only hoping I can pull it off with only one Build-Along kit!!! :)

*Please note on the Build-Along kit, that doors and windows are not included, it is just a box of blocks... :)*

Monday, February 13, 2012

OH MY CARPAL TUNNEL!!!

WOW...My wrists are KILLING ME!!!  I spent the other night with them elevated and on ice-packs because they are soo sore from all the sanding that I've been doing!!!

The good news is the two side walls are done, the small spacer wall is done, and half of the front wall is done, (the bottom half!)...the bad news, I still have the bay front, and sides, and then the four triangles... WOAH, that list seems very long!!!

I am very excited though, in all the time that it's taken for me to get going on this house, make some decisions, and make some progress, I found out that I'm almost all done my Miss Lydia Pickett Kit of the Month Club with In Some Small Way... I just got my ladies desk delivered and next will be the bathroom, followed shortly by the kitchen...hopefully by the time I finish with the house, I will be able to assembly-line all the furniture!!!

If you want to check out the website of who I am working with on my Kit of the Month Club, you can go here... (this provides another link over to her webstore), as I am located in the states, and she is not, shipping can take it's time, but the customer service and personal attention makes the wait quite worth it!!! :)

http://www.insomesmallway.com/

Tuesday, February 7, 2012

Exterior Color Pt. II

So I mentioned last week that I was working on an exterior color change... well, I'm still working!!! :P

I have spent about a long time sanding and sanding...Just to show you how long this is actually taking...

I worked on this single wall all day today, literally, and this is how far I've gotten...(remember, to get the true-est color yellow, I want to get as much of the green and blue off as possible...)


I ended up at Home Depot yesterday and picked up the paint color.  I told you previously that I was going with the same yellow as what was shown on the RGT 1/2scale Bungalow on their website, (a very light yellow)...when I requested the paint color from them, they sent me the combination...unfortunately the people at Home Depot were not willing to mix the paint in that way...so I ended up choosing my own yellow...

I chose this size sample...this is quite large enough to cover the house, it's only $3.00 and they mix the color you want...
I opted for Cornsilk by Behr... I don't particularly like the online sample because I don't think it's very true to color...the actual sample I have and the paint that was mixed are much different than this internet rendition, so I'm not going to post it here...you will have to wait until the walls are painted!!! :)

The coordinating colors are going to be Poppy Seed, White, and Grayling, (all by Behr)...


Wednesday, February 1, 2012

Lights, Camera...FRONT DOOR!!!

I told you in a few previous posts that I had been debating on a front door, and then (with all of your help) I decided on combining two different doors to get the look that I want. 

I had created this door previously for my 1/2scale (still not completed) Fairfield. 
While ordering the parts to create this door I also included another door that will be for the kitchen leading to the other side of the house.  I plan for this side to have a little potting area for the owner, as she likes to plant various flowers and herbs and spices... :)

This is the door that I have on tap for this, I'm a little worried because it seems fancier than the front door, but I'm hoping it will look alright...
I plan to have this door sit to the far back of the kitchen wall so as not to jeopardize valuable kitchen wall space.  I will need to cut this door opening before I begin construction, but that shouldn't be to tough... :)

Tuesday, January 31, 2012

Foundation, Pt. I

Back in my planning stages for this house I knew that I wanted to stone the foundation in some way. 

I had tried previously to use the MagicBrik system, in my first few shots with it I've found that I'm not very good at using it in a number of ways, my textures are always wrong, I peel it up too soon, I never remember to mix it with some glue, and most importantly, even if you do it all the "right" way, it's quite possible to still end up with some mess, and I'm way to meticulous to have that happen when it could easily be prevented...

I had usually ended up going with a textured gray spray paint, like I did with the 1/2scale RGT Bungalow.  I wanted to do something a little more detailed, so I thought to go back to the MagicBrik and try again. 

That was, until the other day that is...
I was reading a fellow "mini-er" blogger who was decorating her 1/2scale house for the Holidays.  She mentioned that her decorations had come from Lemax Christmas Village displays.  I hadn't ever really thought about using them before, but I happened to be in Michael's Craft Store the other day and decided to poke on over to the display... I happened upon this!!!

They are rolls of Brick and Pebbles and are sold in a two-pack, (one roll of each kind).  At the price, (and an extra 40% off!), I really couldn't resist and picked up two packages.  I'm hoping, (as of right now) that the brick will make up my foundation for the Country Farmhouse. 

I also, so as not to waste, intend to use the pebble to help me create a walk-way and also possibly under my outdoor porch area. 

The reasons I'm a little nervous are that I am not quite certain it's correct to scale.  I'm hoping, but I'm not positive.  I'm thinking, even if it's close enough to work, that I can conceal it a bit with strategically placed outdoor plants!!!  The second issue I face is that the foundation is very slim, (as in not very wide).  I believe, that probably the best idea for the foundation would be to create a sand grit and paint combination, but that's too plain for me, so I'm really hoping to conjure up a workable solution with this product.

Monday, January 30, 2012

Some Changes...

Since I last left my half scale farmhouse we were working on the lighting channels.  I showed you how I determined where to cut, and how I did it.  Now that all my lighting channels are cut I only have a few remaining steps before I can work on the assembly of the house.  Before I can think about assembly though, I am working on changing the exterior colors. 

Lately I have had a lot of moments where frustration over this house has set in, and for the life of me I couldn't figure out why I have no motivation to do anything with it.  I know that I love almost every aspect of this house, except the exterior color choices I made.  I don't know why, but I cannot get past this color.  So realizing that's where the problem lies I've decided to do something about it.

I honestly feel like the (completely unassembled house) is sitting up yelling at me, saying that "You'd better change the exterior colors for me because I am not happy"... I suppose if other people have dolls that talk to them, the the house can talk to me.  It has been pretty persistant, so I'm going to listen!!!

The original exterior color I chose was Italian Sage by FolkArt with Linen and Wicker White as the accent colors. 
Here's a "reminder"

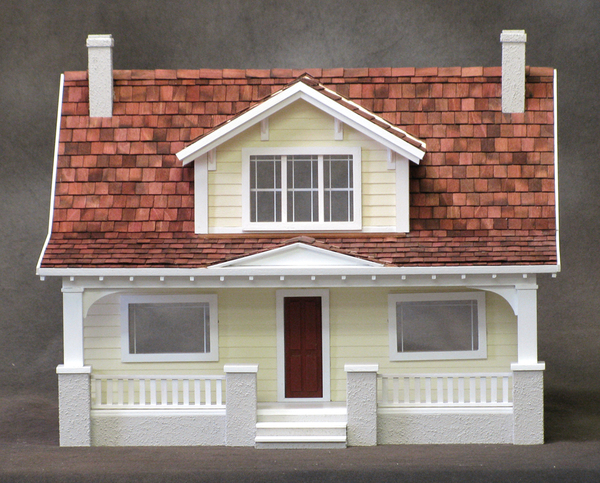
I've decided to go with a muted yellow color and really give it a "farmhouse" feeling.  The color that I chose is the same yellow used here on the RGT 1/2scale Bungalow dollhouse, (this image taken from their website). 

Being that I already finished a green house, (coincidentally the 1/2scale Bungalow I finished for my mother), I wanted something with a different feel.  Of all colors that I had considered, this yellow, to me anyways, seemed more of the direction I wanted to take. 

The first step at this point, because if you can remember this far back, I had painted the house all blue, then primed over that and painted it the green, is to sand off as much of the paint as I can.  A word to the wise here...PRIME!  I am sanding off the green, and it is coming off very well, but, as I'm sanding, I'm remembering that I did not prime the house before I painted the blue...originally!  So the blue is not coming off as easily as I would like.  I am burning through sandpaper faster than you might even believe!!!

As slow going as it is, it's still going, and I have a great new inspiration for wanting to work on this house...so I'm stoked that as soon as the sanding is finished, you are going to start to see some awesome progress being made!!!


P.S.

Just an update on my "Give-Away", the box was received and I think the "new owner" loved it, (maybe not as much as her dad though!), here is a link to watch the video of her opening it, (with the unexpected help of her dad, which I find ABSOLUTELY ADORABLE!)... Check it out if you are interested...and then stick around and watch some of her other videos...

Monday, January 16, 2012

You Never Can Tell...

So you know the other day, when I was telling you about the great dining room auction that I won on Ebay, and how I wished the seller had had more chairs to go with the set? 

Well, I messaged the seller asking the exact question and they informed me that they had posted an auction that for more chairs, (the last of the bunch) and guess what...I won!!!

So, I'm now the proud owner of 4 side chairs, 2 arm chairs, the table and...ta-da-da...

A matching hutch!!!

I needed the hutch like I needed a hole in my head...but it went with the set right?  Because we devoted sick miniature-people do things that make sense only to us...like buy an entire dining room set without really having a dining room to put it in...

P.S. the first set, the two arm chairs and side chairs and table arrived, and I was worried they wouldn't match well, they match perfectly!!!