Thursday, November 10, 2011

Tipping the Scales…

So while I may have brought the Woodstock down, I definitely brought the Country Farmhouse up! 

I definitely do still have to go through all of my halfscale items to see what I might need to get and what I can live without and plus make sure that there are no missing pieces of the house that I might need in order to finish the actual build.  Not to mention I need to locate the missing directions for the Farmhouse!!!  I know off the top of my head that I have all the windows I need, but I do need a front door...

I'm very excited to work on this, because at this point, I think most of all of my Lydia Pickett items have arrived!!!  I think I'm waiting on just the kitchen set.  So building this house will be twice as exciting as I get to build all the furniture for it afterward!!!

I thought I would add some of my pictures from my previous blog posts to catch you up...
The classic “box” shot!
Box

Dry fit pt.1
Dry-Fit6 
Paint color choices…
Paint Colors02

The doorway I cut into the living room wall
Doorway02

Wednesday, November 9, 2011

Changing Course…

So I spent most of the day Monday packing up the Woodstock and moving it downstairs.  It’s carefully put away, and along with all my grand plans, it’s awaiting it’s glory day…until then it will hibernate in the basement.

In having to pack all of these things up and move them, I did a lot of thinking.  I realized that while I’m down, I’m not really out… ;)

I semi-forgot that I have the 1/2scale Country Farmhouse sitting in a box, unfinished in the basement.  I'll have to go through the box and make sure I have everything I need to finish working on this…and we may have found the newest subject for my blog!

The next idea I have is inspired by another miniature maker…she is doing a sort of replication of her childhood home and turning it into a haunted house.  While I don’t want to re-create my home, or make a haunted house, the “childhood” theory struck a chord with me. 

My very first dollhouse was a Greenleaf Coventry Cottage.  My house was never fully finished, (no porch posts, no shingles, no windows or frames, and no paint really to speak of, I still loved it!!!  I remember my birthday party that year, I had gotten a bunch of pieces of furniture for it, I had decorated it with stickers and towels for rugs.  I had ended up giving it to my cousin,when I felt I was too old to keep it, and it got crushed by my grandpa when he accidentally fell on it. 

I had tried to re-create it a while back, and I didn’t have much success with my newbie status and since then have wanted to do it again.  I realized that I have just enough left in gift certificates from HBS to get one with a good sale, so that could be another possibility.  A third and final maybe is a Greenleaf Glencroft.  A close friend did one and I was able to help a little, I love it and think I could have a lot of fun with one, but I’d need a great sale at HBS for that to come true.

So for the time being I’m going to see if I can find some free time to work on the 1/2scale Country Farmhouse.  So stay tuned for more… :)

Tuesday, November 8, 2011

A lesson learned the hard way…

I have certainly learned my lesson.  I will never again purchase a house with any parts of MDF in it...just when I get back started blogging and getting serious about this dollhouse this time, I get hit with some disappointing news. 
 
I sort of explained to you the situation with my MDF exterior walls and the problems that they are creating with these "divit" things, well yesterday after a very disappointing dollhouse-filled day, I finally had to admit defeat. 
 
I had previously put DAP onto each and every clapboard, painstakingly sanding away at my DAP covered walls and then yesterday I finally decided that I wanted to see some of the glory of my hard work.  I cleaned up one exterior panel and went to work priming!!! 
 
Talk about counting your chickens before they are hatched!!!
The walls are still just as bad, almost as if I had done nothing at all to them. 

As a result of this, I am super upset and super frustrated, I refuse to keep sanding, and I refuse to do anything else but replace these walls.  I truly do not want any of this MDF anywhere now.  I’ve put money into it, and planned out everything so nicely, that building it in it's current condition would be very depressing to me.  So now, no matter how much I sand and sand away, I’M always going to know that it looks this way, and I'm too much of a perfectionist to put it together looking this way. 

The cost of new walls is very far out of my budget…it’s not even a possibility at this point.  So my husband and I sat down yesterday and had a long discussion about it, probably a longer discussion than a dollhouse, namely this one, deserves!  We finally came to the only solution we could, put it away until maybe my daughter is a few years older, and old enough to help me work on it, and then, maybe we will be able to spend the money to purchase the better walls.  So I guess that until then it’s going to be stored away. 
 
Very sad, and a very hard lesson learned… :(

Friday, November 4, 2011

Sanding stinks!

I love your comments, and I hope you don't think I'm rude not to respond...for some reason I can't!!! :P  So if you ever have a question or comment, I do read them, I appreciate them very much :) and I will answer in the next post... :)

I told you about my mistake of a lifetime with this house...NOT double checking that all of it was MDF!!!
I place blame else-where because I'm too immature to accept it myself... :P

Anyways... I showed you previously that my house looked like either the neighborhood children hate it and throw their baseballs at it, or one day maybe the owner got mad at it and started hitting it with his golf club, or like a fellow mini-blogger commented, "maybe it was in a freak hail storm!"

Just a refresher of what I'm dealing with... 

No matter what the cause...it had to be fixed...I felt that it just wasn't good enough to sand it and pretend that it didn't exist...if I'm going to spend the money on the kit and I'm going to put the work into it that I plan on, this exterior look was completely un-acceptable to me!

I had contacted the company and requested a price on replacing all the MDF walls w/milled plywood walls...well, out of my budget... so the really only other solution was to DAP each clapboard with a thin layer, (a steel spatula tool worked the best for this) and then sand it back off again...

I used DAP that goes on pink and dries white
as everything was primed before I encountered this problem,
made life easier!
*Sorry, the camera lens was fogged up because it spent the night in my cold car!

This is what it looked like once it was all dried...:P
I'm now at the point of sanding all of this back off again
...and it's soo much fun!!! :P 
NOT!

*but...it does look really good... :P

I have a system going at this point, sand 7 clapboards, vaccum up the dust, go back, touch up, vaccum...I could go into business with this new talent of mine, do you think there's a market for DAPing dollhouse walls?

I will end up replacing some of my pre-painted walls...4 at this point, with the milled plywood versions.  They are just beyond repair.  I'm waiting until I finish sanding all the walls and get a coat of paint on them...once I see the final finished product and depending on the final outcome...I may have to breakdown and go for all the walls... :P


Thursday, November 3, 2011

Here you go... ;)

Alright...here you go "Honey"... ;) 

I don't have too much to report...(I'm still slaving away at sanding each and every clapboard on each and every single wall...and it's painful to my arm and incredibly time consuming...)  

I had mentioned previously my intention to replace the standard front door with one with side lights.  I knew going into this kit that changing the front door was completely necessary, it was just to blah for a house such as this.  I don't know why, but ever since my very first dry fit, the foyer called to me for sidelights in the front door.  I caved...I ended up with the Houseworks Sunburst door, just slim enough to fit into the tiny alloted space and allow for exterior lights. 

My dh finally got around to cutting out the new door opening for me, and I'm pleasantly surprised at how much I actually like it!!!  It fits perfectly even and allows for me to have the exterior lights that I want...
You can see from the photo that I have some work to do at the very top where the "sunburst" that I cut out would go...I chose not to cut out this opening on the interior, so I will fill that gap that remains from the inside...

While he was at it, he also cut the third floor side windows for me... I also knew that I wanted to put a window into each side of the third floor.  I am not using this as attic space and being a HUGE fan of natural light, it, to me, achieves just that.   

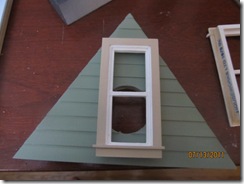
Finally...I had needed another of these third floor windows (shown in place above), while poking through the store website, I came upon this style, (shown below) and ordered enough to replace the ones shown above, 1 dormer and 2 side-walls.  I will cut the pediments off of these as I did with the main house windows and I think they will fit in much better with the theme of the house. 


Wednesday, November 2, 2011

A Permanent Residence...

A few (old) posts back, I may have mentioned I was working on my craft-room...well, it was finally finished during my leave of absence... ;)  We re-painted the walls, and all the coordinating trim in the room, and set it up to create a beautiful play area for my daughter and a nice space for me to craft in.

The house is comprised of the RGT Hawthorne house and the RGT Mansard addition for one side.  On it's own the house is substantial.  After a trip to the RGT Clearance sale, and a great deal, I might be adding a 2nd addition kit to the other side, (eliminating the side porch, stay tuned for more on this...it's still up in the air).  I had intended to build the mansard addition to be separate from the house, (and just push it against the house), making it much easier to maneuver.  With the possiblity of adding this second addition kit, this is even more necessary. 

However given that when all of this is put together it is  going to be rather substantial, so finding a home for it became rather necessary.  My original idea was to use my sofa table and create a base for it under that.  However, as my husband explained, (and even though I don't want to admit it, he's right), it's depth is not really there. 

So I ended up picking up this table at good ole' Walmart for under $40.00.  It's looks small in this picture, but it is just wide enough and just long enough to support the weight of the entire structure.  I still intend to create a base for the house, as I would like to make a "yard" of sorts... but it works for now.  It folds in half for storage, and very versatile, so we can use it for something else if necessary...

Tuesday, November 1, 2011

Necessary, but boring!!!

I first off want to say thank you to those of you who sent lovely comments and emails...they are greatly appreciated!!! :)  I also wanted to add, that I should have written in my opening line, that although I have left you in the past, I don't intend to do it again.  Of all things that I enjoy keeping up with online, my blog is one of my favorites, and I've chosen to leave some of the others behind for it.

My mini hobby is going to be in full swing now, I live on the east coast and we got dumped on this weekend...26+ inches of snow & rain & ice...it was a good thing, for me, that it didn't cause a power outage, like the ice-storm in 2008, (we were out of power for 15days!)... check out some shots to share... (I totally make fun of people who live on the east coast for taking pictures of snow too!!!)

The tracks are from my dog at midnight,
(I couldn't get him past the door to go to the bathroom)

This is from my front door, looking into the door to my garage
(that is my husbands work truck, he took his Jeep to go plowing all night)

This is my back deck!  My garden is GONE...
(typically we have at least 2-3wks before snow, so I hadn't winterized it yet... :(
 Moving on...

I have no pictures to share really... I've only been painting, priming, sanding and other completely boring, but very necessary.  The ledges and facia for both the addition and the tower are now done, and I have one more step to complete on the main windows and they will be finished. 

I intend to have all my doors, windows and other components done before I start the main structure.  I got this tip from one of my favorite bloggers who has built almost every single Greenleaf house on the market...and it's a great one!!!  I did this for the 1/2scale Bungalow and it just makes it that much easier.

I ended up doing a color change about a 1/4 of the way through the DAP process...I got completely tired of the color I think, from sanding and painting and sanding and painting it!!! :P  As a result I do need to change the color of the front door and because of all the difficulty I had getting it to the black I wanted, it's not going to turn lighter very easily.  So I am in need of a new front door, (not a different style, just a new door, I've sanded and worked the one I have to oblivion!!!)... I'm super excited about the color prospect so I hope I can get the components done soon so I can show off!!! :)